Tuesday, December 2, 2014

A Ninja in the Kitchen... Nutri Ninja with Auto iQ Review


The number of blender and blender combos that have passed through my kitchen over the years seems endless.  From cheap store brand models to expensive high end machines, I've tried them all.  Some exceeded my expectations, some didn't, but mostly I've been frustrated at trying to find one that works for a decent price.

However... I think I've found it!  Meeting Ninja representatives at last fall's International Food Blogger Conference in Seattle, the smiling company representatives brought a sense of community to a room full of strangers, and the Green Smoothie with Pineapple they offered refreshed my over-indulgence with raw nutrients.


Impressed with the ultra "smoothness" of their smoothie, an offer to test and review the Nutri Ninja with Auto iQ had me responding an immediate, "Yes!".  Could a product with a blender, food processor and multi-sized serving cups (with tops) really do the job?  In a word... Yes.

As an owner (and lover) of one of those expensive models, this Ninja had its work cut out for it.  I've become used to ultra smooth smoothies, perfectly blended pesto, creamy hummus and evenly crushed frozen margaritas at the touch of a button.  Now to test the Ninja.


Click here for recipe
First up, one of my favorite green drinks and probably the easiest test for the Ninja, the Apple Arugula Detox Drink.  Placing half of an apple along with handfuls of arugula, goji berries, flax meal and chia seeds along with a few large ice cubes into one of the serving cups I screwed on the blade assembly and fitted the cup into the machine.

Pressing the Ultra Blend button the machine went into action stopping and starting (pure brilliance!) so the ingredients kept falling to the bottom (and I didn't have to scrape any sides) where they then blended up evenly.

That's the "Auto iQ" system where "unique blending, pulsing and pausing cycles deliver consistent even results every time".  And it did.  Time and again the cycle brought smooth smoothies and blended green drinks with no stray unblended chunks of anything.  Even the chia seeds disappeared into the mix.

Pouring a perfectly blended (and I do mean perfect) drink into glasses, my favorite part of the process was simply placing the blending cup into the dishwasher.  Something I can't do with that expensive unit that always needs to be washed by hand.  Score for Ninja.

Click here for recipe
Next up, our favorite Sun-Dried Tomato Pesto.  Simple blenders and a small food processor haven't been able to puree the sun-dried tomatoes and basil evenly, leaving nonuniform pieces throughout.  The Ninja?

Again, the blending, pulsing and pausing worked beautifully in the cup bringing a uniformly blended pesto.  So we tried again with a larger batch in the food processor bowl.

A big batch of pesto perfection took less than a minute from start to finish.  And... the blade removed from the food processor bowl they simply popped into the dishwasher for cleanup (note I usually wash the blades by hand to retain sharpness - the dishwasher can dull them over time).  Another score for the Ninja!

But how about a the classic blended margarita?  I'm fairly picky about this one, and many times blenders leave a nearly perfect blended margarita with a few unappealing big chunks of ice floating in the cup... but not the Ninja.  Perfectly slushy, frozen margaritas at the touch of a button.  Having friends over, they kindly offered to be Ninja testers so we blended up another margarita batch, this time with fruit (whole blood oranges) mixed into the ingredients.  Results?  Cheers all around!

Since receiving the machine I've found myself reaching for it multiple times a day, and I love having the food processor bowl attach to the base, making it two machines in one.


Chia Hummus with Sun-Dried Tomatoes and Za'atar
Need to process a batch of hummus?  Placing the ingredients into the bowl, the blade system works extraordinarily close to the bottom of the bowl ensuring a smooth, creamy result...  Every time.  My most recent attempt at hummus included those sometimes difficult to blend sun-dried tomatoes, but they proved to be no issue for the Ninja blade system.

On a side note, I used every part of this system for my Thanksgiving dinner prep... Butternut Soup in the blender, small batch Cranberry Sauce in the cup, streusel for the Sweet Potatoes in the food processor, green drink to keep my energy up in the cup, crumble for the Cranberry Apple Crisp in the food processor, etc.  

Oh... and did I mention Acai Bowls??  Creating a thick acai "sorbet" is sometimes difficult.  Maintaining the thickness is key, but in other processors or blenders we've had to add extra liquid to get the ingredients to blend completely, hence making them more into a smoothie, and therefore no longer the desired thick acai bowl consistency.  Again, not an issue for this machine.

Blended Acai Sorbet for Acai Bowl... thick and smooth, just like it's supposed to be!
Here's a rundown of the pros and cons we came across in our month-long test:

Pros
  • Smoothies in a snap!  Smooth and creamy every time with no unprocessed "chunks" of anything.  The Ninja has become our "go-to" Smoothie/Green Drink blending machine for its cup on the go convenience, consistent quality and pure ease of use.  See next point...
  • Clean-up.  Pieces come apart easily and wash up in the dishwasher or by hand with ease (no blades to cut your fingers when washing the bottom of a bowl or pitcher).
  • Blender, Cups and Food Processor all in one.  You can get rid of that old Food Processor and blender you have in the cabinet and you're set with this one product.
  • Food Processor blades are shaped process smooth uniform results and clean up easily with little to no scraping of the bowl necessary. 
  • Suction cups on the bottom of the base.  One of my favorite things!  These cups "suck" amazingly well to the counter and the machine won't move unless you want it to.  No wobbling off the counter when your back is turned.
  • Price... You get a blender, ice crusher and food processor all in one along with a kitchen workhorse (Ninja-style!) for less than those other expensive blender models.
Cons
  • A little noisy... but aren't all blenders?  However my husband complained that he thought this one was a "little too loud" (note that he's a little sensitive before his morning coffee... ;)  ).
  • Nut butter... while the machine made a decent nut butter, it wasn't quite as smooth as I would have liked it on the first process.  Another processing though and it was fine, and we found it worked better with a larger sized batch.
And there you have it.  Often we give the products we review to friends and family, but this beauty is staying with me.  I've given away my old food processor and store brand single use blender and now I have a Ninja in my kitchen.  Nutri Ninja Acai Bowl anyone??

Acai Bowl blended in Ninja cup

Liv Life Note:  Liv Life received the Nutri Ninja Auto iQ System from Ninja, but we were not paid to write this review.  As always, I would not have reviewed the item if I didn't fully believe in it and unless I could whole hearted recommend it.  Thank you Ninja for the opportunity...  I'm looking forward to a long relationship with this product!

For more reviews and Ninja recipes see:
She's Cookin
Let's Dish
Ninja Recipes


Sunday, November 30, 2014

Sol Republic Relay Giveaway and Peanut Butter Krispie Treats

Yum
Somehow every pair of earphones that sees their way into my life seems to walk off with one or the other of my two teenagers.  Hence I'm left with the ones that came with my phone that don't really fit into my ears.  Hence again, I don't really use them.

Last week though, Sol Republic made a change in my life when they sent a pair of Everyday Active Relays with MY name on the box.  "No," I told both kids, "these have are mine.  This is for work, I need to review them."  And off I went to the gym for a test run and where I listened to music that actually sounded full and rich for the first time in forever.


And they didn't fall out of my ears (Finally... a set that stays in!).  And I changed the volume with the little tab on the cord.  And I love them.

But, good mom that I am, I let the kids have their go this holiday week for a more comprehensive review, and once again I've been asked, "Mom, these sound awesome... can I have them??"

Coming with different sized ear-tips, the relays fit all of our ears, and I love the Sol Republic "Ear-tips For Life" program. Lose an ear-tip?  Need a different size?  Simply fill out the form on the website and they'll send you a new one.

Founded in 2011, the three founders (consumer electronics veterans) have set out to "rid the world of hollow sounding headphones and to make great sound available to everyone."  In my opinion, they've succeeded.


Entering this holiday season, I've enjoyed a fabulous Thanksgiving with my entire family all under the same roof for the first time in months.  My husband made it home just in time for dinner, and my son surprised me a day early as he arrived home from college.  I've loved every minute baking and cooking up a storm, and these Peanut Butter Krispie Treats were requested to bring back to the UCSB dorm.

As I packed them carefully in the top of his backpack, little did I know I covered up the Sol Republic Relays, and just hours ago I received a text from him saying, "Everyone loves the treats.  Hey... I thought you were keeping those headphones for yourself, but thanks!".  Good thing I've already ordered a pair for him for Christmas... looks like maybe I will finally  have a set for myself...

Now with everyone headed back out into the world I'm ready for some holiday shopping and I'm eager to help you too.  Perfect for any active music lover on your list, these relays will bring smiles as gifts are opened.

Sol Republic has kindly offered up another set of these Everyday Active Relays for us to giveaway!  Simply enter the RaffleCopter below and you may have a set under the tree with your name on it... just like me!  And the Peanut Butter Krispies??  Those are just a bonus.


Sol  Republic Relay Giveaway Fineprint
  • Open to USA and Canada only
  • Giveaway Closes at noon on Sunday, December 7th, 2014.  PST
  • Use Rafflecopeter below to enter
  • Product will be supplied by Sol Republic, no guarantee of color, but request can be made
  • Giveaway value $79.99
  • Giveaway is for one set of Sol Republic Everyday Active Relays


Peanut Butter Krispie Treats
A favorite in our family for years, basic krispie treats receive a luscious topping of a Chocolate/Peanut Butter Ganache for something a little extraordinary.

6 cups puffed rice cereal
1 bag (10.5 oz) marshmallows
2 Tbs butter (or butter alternative, we use Earth Balance)
1 1/4 cups creamy peanut butter
2 cups dark chocolate, chopped


Prepare a 9 x 13 pan with cooking spray.

In a large bowl mix the cereal and mini peanut butter cups, set aside. Melt the marshmallows and butter together in a medium saucepan over medium heat.  Pour the melted marshmallow mixture over the cereal mixture, quickly stirring well to evenly coat the cereal. Pour the cereal mixture into the prepared pan and evenly press into the pan.

In a small sauce pan melt the peanut butter and chocolate over low heat, stirring to combine.  Pour the melted chocolate over the cereal mixture, spreading with a rubber spatula to cover.
Allow the topping to set, then cut and serve!

Note:  We were too impatient to allow ours to set, so we placed it into the refrigerator for about 1/2 hour to speed up the process!!
Liv Life received one pair of Sol Republic Relays and Sol Republic is also supplying the giveaway product for this post.  All opinions and thoughts on the product are mine and that of my kids (also relay testers).  We wouldn't recommend then if we didn't like them.  
Giveaway Directory

Monday, November 24, 2014

Basic Roasted Burssels Sprouts and a Brussels Sprout Roundup


Tight, leafy mini cabbage-like buds, they're filled with nutrients like protein, vitamins, minerals, fiber and antioxidants, and these little guys can also bring cholesterol lowering benefits.  Brussels Sprouts bring a whole slew of health benefits to your plate.

But, my family won't eat them.  Well, let me rephrase, my husband and kids won't eat them.  My dad has eaten them for as long as I can remember, but up until a few years ago I was in the same boat as my husband and kids. 

I vividly remember cringing at the smells coming from the oven when Dad roasted them.  I never tried a single bite, and vowed to never, ever try.

But I did try... last thanksgiving my girlfriend, Amy, made a basic roasted pan of brussels.  They didn't look so bad.  With just a little olive oil, butter, salt and pepper, they actually looked good.  And since she had been so nice to make them as she knew my dad liked them, it wouldn't have been polite not to try.

So I did... and I liked them.  My mom and dad liked them.  My neighbors liked them.  My husband and kids?  They didn't have an issue not being polite and passed with a "no thanks" as the bowl went around the table.

Since then I've made this basic recipe a number of times and finally convinced my husband to try.  He pierced one with his fork, popped it in his mouth and promptly said, "I know these are good for you, but isn't there a better way to make them?  Something with more... pizazz?"

Hence, our Brussels Sprout Roundup!  Who knew there were so many ways to make these little guys?  And there simply has to be at least one recipe here he will like.  Any thoughts on which one I should try for him first?

14 Brussels Sprout Recipes
plus a basic roasting recipe at the bottom


From The American Bite

From The Lemon Bowl

From An Edible Mosaic

From The Housewife in Training

From Food Faith Fitness

From the Healthy Maven

From Lexi's Clean Kitchen

From The View From Great Island

From Jeanette's Healthy Living

From American Heritage Cooking

From Jessica in the Kitchen

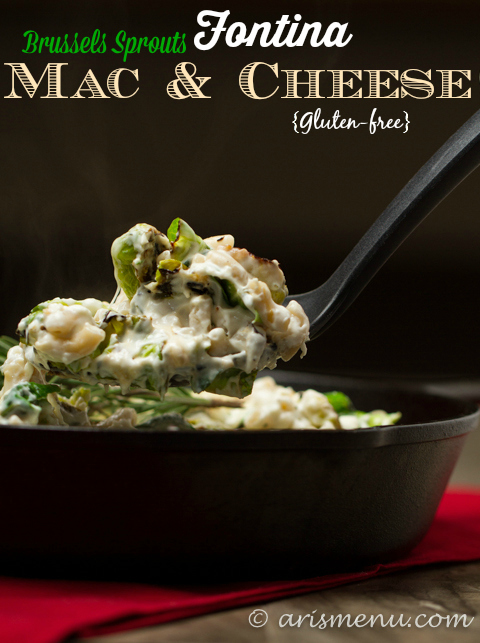
From Ari's Menu

Basic Roasted Brussels Sprouts
A good way to introduce brussels to your family, this basic recipe is one of my favorite.  Easy to toss together and full of flavor with a touch of saltiness.


Brussels Sprouts ~ about 1 - 1 1/2 cups or so
1-2 Tbs oil (we like avocado oil)
salt and pepper to taste

Preheat oven to 400º.

Trim bottom of sprout (to trim off brown "stump") if desired.  Pull any loose or yellowed leaves from sprout, then cut the sprout in half.

Place sprouts onto a baking sheet and drizzle with oil.  Toss with your hands to coat, then sprinkle with salt and pepper to taste.

Place sprouts into the oven and roast about 25 minutes.  I like my sprouts to be slightly crisp on the outside, but if you don't, remove them when they feel tender when pierced with a sharp knife.  Alternatively, leave in a bit longer for even crispier sprouts.  

Remove from oven and serve.

Liv Life Note:  I save the leftovers in a covered bowl in the fridge and like them cold right from the bowl the next day!

Liv Life Note 2:  I found that just a small amount of oil works for me... I have friends who prefer more oil and use up to a quarter cup per 1 1/2 cups of sprouts.  My girlfriend, Amy, also placed chunks of butter of the sprouts.
 

Friday, November 21, 2014

Jeweled Holiday Salad with California Endive, Roasted Beets and Butternut and a Pomegranate Vinaigrette


Autumn brings color into our lives with not only with falling leaves, but with colorful produce filling the tables at local markets.  Brightly hued butternut squashes contrast beautifully with vibrant bunches of greens and brilliant baskets of pomegranates.

California Endive
Endive Instagram!
But have you thought of California Endive?  For years I'd walked past those little torpedo-like greens simply because I didn't know what to do with them.  Then a few years ago a girlfriend served the leaves with a savory filling at a holiday gathering, and I've been hooked ever since.

A member of the chicory family, endive is related to radicchio, escarole and frissee.  Its crisp texture and sweet nutty flavor bring a mild bitterness to your recipes, and endive is good either cooked or raw.

A California girl through and through, an opportunity landing in my inbox to promote California Endive shines right up my alley.  But the opportunity didn't stop there... A box filled with brilliant, perfectly formed red and green California Endives arrived packaged with a can of Italian Nudo Olive Oil and a Bottle of Rios do Chile Carmenère along with a challenge to create a fall themed side dish suitable for your holiday table.  My kind of challenge!!

I have to admit to using the olive oil for a few days before getting to my fall challenge.  Do you recall the Smashed Avocado Toast topped with Oiled Tomatoes? Yep... that was the Nudo Oil.  We tired the toast with Nudo oil and again with a generic oil from my pantry, and Liv actually noticed the difference without me saying anything.  This Nudo oil is a keeper.

Here's were my food blogger job brings me incredible satisfaction as well as introductions that grow into relationships.  Nudo Italia features a concept that swells my heart... I think it's best said in their own words:


Jason Gibb and Cathy Rogers set up Nudo in 2005 after buying and restoring an abandoned 21 acre olive grove in Italy's Le Marche.

Their love of the Italian countryside inspired their now famous adopt an olive tree programme which allows people all over the world to adopt an Italian olive tree and receive its oil. The programme involves a collaboration between a group of small scale, artisanal olive producers in Le Marche, Abruzzo and Sicily. Each olive farmer keeps responsibility for the care of their grove, and all the olive oil goes into the Nudo adoption programme.

In giving financial security to the olive farmers, the programme makes viable the traditional farming methods which, quite simply,produce the world's best olive oil.

A love of simple natural food is the starting point for all Nudo products. They are all made from 100% natural, high quality, locally sourced ingredients. Why use artificial preservatives when olive oil is one of the best preservatives there is - and the most delicious?

Real oils pressed from trees raised with the love of the land owners keeps the quality high and the oils special.  Most exciting for me is the Il Fico Grove owned by Saverio Adamo.  While I didn't actually visit the grove near Alcamo on the Trapanese Coast of Sicily, my husband and I spent a day in the area, and I believe we drove nearly right by.

Trapanese Coast of Sicily seen from Erice ~ 2010
But back to our challenge... with beautiful California Endives and this fabulous olive oil, a colorful holiday salad seemed to be the proper venue to let the pure flavors of the ingredients shine.

Returning to a favorite of my Mom's, I roasted brightly hued butternut with garnet colored beets and fragrant sweet onions with the Nudo Oil and seasoned it all with a few dashes of dried oregano.  Moments later my kitchen sent aromas into the air that had us all swooning.

California endive and organic greens
Red endive adds holiday flair
Pairing the endive with fresh organic Farmer's Market greens (our mix had frisee, spinach, baby lettuces and arugula), I loved the contrast of the red endive with the emerald greens.  Truly a holiday mix, the roasted vegetables and pomegranate completed our rainbow.

But what about that Chilean wine you may ask??  As I tinkered with the salad, wine in the recipe just didn't seem right.  However, the Rios de Chile in my glass as I chopped, roasted and sliced made for a lovely evening.

Inviting my husband to partake as I prepped the salad (he was just home from a week long business trip), he took a sip and let out a long sigh along with an "Ahhh... that hit's the spot, did you pick this wine yourself?".

I'll admit here that my expertise in wine tasting doesn't go much beyond "Yep... that's a good one!" or "No, this one really isn't for me", but in this case, the Rios de Chile falls into the first category, "Yep... that's a good one!".  I wouldn't hesitate to bring a bottle to a gathering for any holiday this season, and I impressed my husband with my choice.  Here I'll leave you with the more professional tasting notes from the Pacific Wine Group:

"Intense ruby red with violet tints.  In the nose, aromas of dried fruits, red pepper and spice stand out.  In the mouth it is elegant, with soft round tannins, it's a wine with good persistence."

Wine with good persistence... while I'm not exactly sure what that means I like the phrase.  This wine made my salad prep a pleasure, and paired beautifully with our meal as we finished off the bottle.


Using the red endive for more of a holiday feel, this recipe will go beyond the holidays for me.  Filled with goodies like the roasted butternut and beets, the salad is hearty enough for a light lunch as well as and ideal vegetarian side to a holiday gathering.  Bright and jeweled with the colors of fresh California produce, the Italian oil and Chilean wine brought a bit of an international affair to our table.

Thank you to California Endive, Nudo Italia, and the Pacific Wine Group for the products that led me to this fun post filled with fresh produce and trips down memory lane.  We have a recipe here that's earned a spot in our regular rotation.


Wednesday, November 19, 2014

Maple Glazed Candied Walnuts


"Liv... give these walnuts a try.  They're glazed with maple syrup and brown sugar and I really think you'll like them!"

"No.  I don't like walnuts."

"Seriously, I think you will like these."

"Seriously.  No.  I don't like walnuts."

"OK, fine.  I've got to finish this laundry then I'm going to finish my photo shoot of them.  You can play with the camera if you want."

"Oh!  Ok.  I'll see if I can get a good shot."


Health benefits of walnuts
So went our conversation this morning as my girl spent a few much needed hours perhaps missing school and spending the morning home with me.  The house smelled fabulous as the glazed nuts cooled with aromas of maple and brown sugar wafting through the kitchen.

Off I went to swap the laundry and fold a quick load upstairs, and I left Liv in the kitchen to play with the camera.  She's become quite good at photography, and often gets a nice shot or two for me to use.

Some 20 minutes later I returned to the kitchen to find her sitting at the kitchen table playing on her phone and.... finishing off the last of the glazed nuts.

"Seriously??  You don't like nuts?"

"Seriously.  I like these nuts.  They're crunchy.  And sugary.  And mapley.  They're totally awesome!  Can we make more??"

"More??  I have a whole batch here."

"Ummm... sorry.  Not anymore.  I might have eaten them all...."

Yup... she ate the entire batch.  And she doesn't like walnuts.  It was all I could do not to say, "I told you so!".

Instead we reached for the pan and started again.  She did most of the work this time and now has one more recipe under her belt that she can whip out at a moment's notice.  Maple Glazed Candied Walnuts... this recipe should be in everyone's repertoire.


Maple Glazed Candied Walnuts
Photo Credit ~ Liv

Tuesday, November 18, 2014

Lentils with Butternut, Pearl Onions and lots of Lime


This time of year things get busy.  Really busy.  Hence, I'm all over a quick meal based on what I have on hand and with ingredients that allow me moving fast.

Enter Melissa's Produce and the San Diego Food Blogger's Fall Challenge.  With Melissa's bringing ingredients right to my doorstep, some of my favorite San Diego Food Bloggers and I are putting together recipes "Chopped" style based on what's in our Melissa's Produce Box.

Including butternut squash, pearl onions, shallots, dried cranberries, pine nuts, baby Dutch yellow potatoes, steamed potatoes, and packages of steamed (ready to eat!) fava beans, black eyed peas and garbanzo beans, our directions to use three or four of the ingredients had me immediately eying the squash and pearl onions.  The rest would follow.

My experience with pearl onions dates back more years than I care to share.  As a little girl I remember adults at parties garnishing cocktails (I think they were martinis) with pearl onions, and I recall vividly thinking those little globes would never be a part of my life.

My next experience came in the form of a winter stew, filled with way too many pearl onions that had been cooked for far too long.  Again... I made the vow to avoid those pearls.

However, being an onion lover, my interest piqued with the bag of perfectly formed little onions in my Melissa's Box.  Could I incorporate them and be pleased with the dish??  In a word... Yes!

Short on time and patience after a day of driving (I had spent over 3 hours behind the wheel and never left an 8 mile radius), I've never been so thankful that someone had done the shopping for me.

Grabbing the squash, I quickly had it peeled and seeded, then chopped into cubes, and the pearl onions also peeled quickly after a few minutes in boiling water.

Drizzling them both with a splash of oil and a sprinkle of salt and pepper, I tossed the pan into the oven and grabbed a package of prepared lentils (Love this Melissa product... they just weren't in our box), a box of broth and Melissa's steamed and peeled garbanzos.

Placing the lentils, broth and garbanzos into a pot I added a small scoop of red curry paste and stirred until heated through.  Some 20 minutes later the vegetables were roasted to perfection and I simply added them to the lentils.  Upon tasting though, the flavor was a bit flat.  A dash of salt helped, but what really had this dish dancing was a squeeze of lime.  Actually, a few squeezes of lime and a handful of chopped cilantro.

I toyed with the idea of garnishing with the pine nuts, and I know they would have been fabulous here, but the freshly roasted butternut squash seeds were simply irresistible.

Bright and flavorful in about 30 minutes, this dish pleased the whole family and brought a bowl of healthy ingredients to the table.

My thanks to Melissa's for providing me with the challenge box, I think this one ranks up there as my favorite to date.  How can you go wrong with roasted butternut?  And those pearl onions...???  They won't be a stranger in our house any more.  Melissa's made a stressful day just that much easier.  Thank you!


Sunday, November 16, 2014

Acorn Squash Roasted with Maple Syrup and Vanilla

Acorn squash roasted with Maple Syrup and Vanilla

For years I've walked right past the Acorn Squash at our local markets.  I simply didn't know what to do with them.  Do you eat the skin?  How would you peel them?  Do they taste weird?  Would my family like them?

Oh my goodness, why did I wait so long??  Often I preach to Liv that she needs to be more adventurous and try new things, but now I think it's high time I listened to myself.

Tender and buttery, acorn squash has a light sweetness with slight nutty overtones, and it's positively irresistible when roasted with maple syrup and a splash of vanilla.

Acorn squash roasted with Maple Syrup and Vanilla
A native to the Americas, squash, including acorn, has been found in archaeological digs in Ancient Mexico dating back to before 4,000 BC, it was a staple in the American Indian diet.  A good source of fiber and potassium, the acorn squash also serves up Beta-carotene and vitamins C and B.

Difficult to peel when raw with it's ridged sides, the acorn squash is often roasted either halved or in slices, then scooped out of its skin.  

Looking for pure simplicity, I took our squash, scooped the pulp and seeds (saving the seeds to roast!) and sliced the flesh into 3/4-inch slices.  Brushing with a mixture of butter, maple syrup and vanilla adds a touch of sweetness as everything caramelized in the oven, and the skin cut easily off when done.

Kicking myself for waiting so long to try these beauties, they won't be a stranger in our house any longer.  I'm now on the search for more acorn squash recipes and would love to hear your favorites in the comments below!  Have a link??  Share away!

Acorn squash roasted with Maple Syrup and Vanilla